

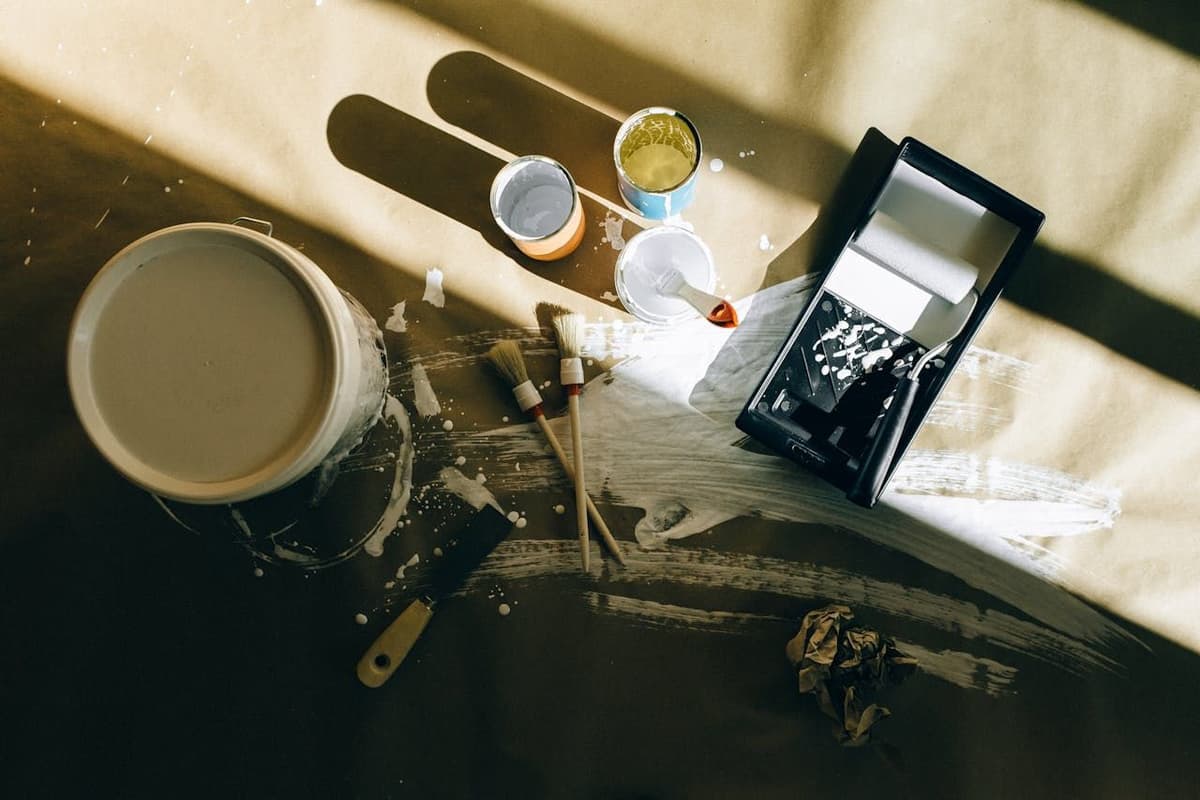
Do you feel like your home needs a refresh? Maybe you’ve been admiring those perfectly styled spaces on Pinterest or Instagram, thinking, “I wish my home looked like that.” Guess what? You can achieve those stunning looks! With a burst of creativity and the pride that comes from crafting something with your own hands, you can make your home feel fresh and unique. Let's explore some inspiring DIY home decor ideas that will breathe new life into your space.
Paint with a Purpose
A fresh coat of paint can do wonders for any room. If you're feeling adventurous, consider an accent wall. Choose a bold color that contrasts with the rest of your room to create a focal point.
How to Do It:
Choose a wall and a bold paint color.
Clean the wall to remove dust and dirt.
Tape off the edges with painter’s tape.
Apply primer if needed, then paint with your chosen color.
Let it dry, and apply a second coat if necessary.
Ideas:
Geometric Patterns: Use painter’s tape to create geometric shapes (triangles, hexagons, etc.) on the wall. Paint inside the taped shapes with a different color and remove the tape carefully to reveal clean lines.
Color Blocking: Divide the wall into sections using painter’s tape and paint each section a different complementary color. Mix bold and neutral colors for balance.
Stenciled Designs: Paint the wall a solid color, then use stencils to add designs like floral patterns, geometric shapes, or quotes. Secure the stencil with tape and apply paint with a sponge or stencil brush.
Metallic Accents: Paint the wall a solid, bold color and use metallic paint to add accents like stripes, polka dots, or stenciled designs. Metallic accents can add a touch of glamour and reflect light beautifully.
Half-Painted Walls: Choose two contrasting colors and paint the bottom half of the wall in one color and the top half in another. Use painter’s tape to create a clean, straight line between the two colors.
Chalkboard Wall: Paint one wall with chalkboard paint to create a functional space for notes, drawings, or inspirational quotes. This is great for kitchens, home offices, or kids’ rooms.
Wallpaper Accent: Instead of paint, use wallpaper for an accent wall. Choose a pattern that complements your decor and apply the wallpaper following the manufacturer’s instructions.
Stripes or Chevron Patterns: Use painter’s tape to mark out horizontal, vertical, or chevron stripes. Alternate between your chosen colors to create a pattern that elongates the space and makes it feel larger.
DIY Wall Art
Creating your own wall art can be a fulfilling and cost-effective way to decorate. Try abstract painting or framing fabric swatches or wallpaper samples.
How to Do It:
Buy a blank canvas from a craft store.
Choose your paint colors or fabric.
For abstract art, pour different colors onto the canvas and tilt it to let the paint flow.
For fabric art, cut the fabric to fit the canvas and staple it to the back.
Ideas:
String Art: Create designs using nails and string. Outline a shape or word with nails on a wooden board, then wrap colorful string around the nails to fill in the design.
Pressed Flower Art: Collect flowers and leaves, press them in a heavy book for a week, then arrange and glue them onto a canvas or inside a frame for a natural, botanical look.
Paper Collage: Cut out shapes, patterns, and pictures from magazines or colored paper. Arrange them on a canvas to create a vibrant, eclectic piece of art.
Typography Art: Use stencils or freehand to paint inspiring quotes or words on a canvas. This adds a personal touch and motivational vibe to your space.
Mixed Media: Combine different materials such as paint, fabric, paper, and natural elements (like twigs or leaves) on one canvas to create a textured, layered piece.
Diptych or Triptych Art: Create a set of two or three canvases that together form one complete piece of art. Each canvas can be a standalone piece, but when hung together, they tell a bigger story.
Spray Paint Stencils: Use stencils and spray paint to create bold, graphic designs on your canvas. This is a quick and easy way to achieve a professional look.
Gallery Walls
Create a gallery wall using your favorite photos, prints, and even small mirrors or plants.
How to Do It:
Gather frames of various sizes.
Arrange the frames on the floor to find a layout you like.
Hang the frames on the wall, starting with the center and working outward.
Ideas:
Thematic Groupings: Choose a theme for your gallery wall, such as family photos, travel memories, or botanical prints. This creates a cohesive look and tells a story.
Mix Media: Incorporate different types of art and objects, like framed prints, canvas paintings, decorative plates, small mirrors, and even sculptural pieces. This adds texture and dimension to your gallery wall.
Shelving: Add small floating shelves to display objects like plants, candles, or small sculptures alongside your framed pieces. This adds depth and variety to your wall.
Washi Tape Frames: For a temporary or renter-friendly option, use washi tape to create frames around your prints and photos directly on the wall. This adds a playful and creative touch.
Textural Elements: Include items with different textures, such as woven baskets, fabric hangings, or wooden accents. This adds a tactile quality to your gallery wall.
Maps and Postcards: Frame vintage maps, postcards, or concert tickets to add a personal and nostalgic element to your wall.
Statement Piece: Incorporate one large statement piece in the center, such as a bold painting or a decorative mirror, and arrange smaller frames around it.
Lighting: Install picture lights or use string lights to highlight your gallery wall. Proper lighting can make your artwork stand out and create a cozy atmosphere.
Pegboards
Install a pegboard for a functional and stylish organization solution.
How to Do It:
Buy a pegboard and mounting hardware.
Paint the pegboard if desired.
Secure it to the wall with screws and wall anchors.
Use pegboard hooks to hang tools, utensils, or craft supplies.
Ideas:
Kitchen Organization: Use a pegboard to hang pots, pans, utensils, and cutting boards. This keeps your kitchen tools easily accessible and frees up cabinet space.
Craft Room Storage: Arrange your craft supplies like scissors, ribbon, thread, and paint brushes on the pegboard. Use small baskets or containers to hold loose items.
Home Office Setup: Hang office supplies such as scissors, tape, notebooks, and pens. Add small shelves for additional storage of stationery or decor items.
Tool Storage: In the garage or workshop, use the pegboard to organize tools like hammers, screwdrivers, wrenches, and pliers. Outline the tools' shapes on the board to keep everything in its place.
Jewelry Display: Create a stylish jewelry organizer by hanging necklaces, bracelets, and earrings. Add small hooks and rods to hold various pieces neatly.
Entryway Organizer: Set up a pegboard in your entryway to hold keys, sunglasses, bags, and hats. This keeps essentials at hand when you’re heading out the door.
Bathroom Storage: Hang hairdryers, straighteners, brushes, and other bathroom essentials. Attach small shelves or baskets for items like towels and toiletries.
Painted Furniture
A coat of paint can make an old piece of furniture look brand new.
How to Do It:
Sand the furniture to remove any old finish.
Wipe down with a damp cloth to remove dust.
Apply a primer.
Paint with chalk paint or regular furniture paint.
Seal with a clear coat if using chalk paint.
Ideas:
Distressed Look: Give your furniture a shabby chic look by lightly sanding the edges and corners after painting to reveal some of the wood or base color underneath.
Two-Tone Furniture: Paint the body of the furniture one color and the drawers or doors another color for a striking two-tone effect.
Stenciled Designs: Use stencils to add intricate patterns or designs to the furniture. This works great on drawer fronts or tabletops.
Ombre Effect: Create a gradient effect by blending two or more colors from light to dark. This can be done on drawer fronts or cabinet doors for a unique look.
Metallic Accents: Add a touch of glamour by painting handles, knobs, or trim with metallic paint. Gold, silver, or bronze accents can elevate the look of any piece.
Reupholstery
Reupholster a chair or ottoman to give it a fresh look.
How to Do It:
Remove the old fabric using a staple remover.
Cut new fabric to fit, leaving extra for stapling.
Stretch the fabric over the furniture and staple it in place underneath.
Trim any excess fabric.
Ideas:
Bold Patterns: Choose a fabric with a bold, eye-catching pattern like geometric shapes, florals, or stripes to make a statement piece that stands out in any room.
Velvet Upholstery: Use luxurious velvet fabric for a rich, elegant look. Velvet adds texture and a touch of sophistication to your furniture.
Modern Prints: Opt for modern prints such as abstract designs, digital art-inspired patterns, or minimalist graphics. These contemporary designs can give your furniture a trendy and updated look.
Two-Tone Fabric: Combine two complementary fabrics, such as a solid color for the main part and a patterned fabric for the accents. This adds visual interest and a custom feel to your piece.
Vintage Fabrics: Reupholster using vintage or retro-inspired fabrics. Think classic houndstooth, tweed, or retro floral patterns to give your furniture a nostalgic and stylish update.
Leather or Faux Leather: For a sleek, modern touch, use leather or high-quality faux leather. This material is durable and adds a sophisticated look to your furniture.
Upcycled Storage
Old crates, baskets, and even suitcases can be upcycled into stylish storage solutions.
How to Do It:
Clean and sand the crates or suitcases.
Paint or stain if desired.
Stack or arrange them to create a storage unit.
Secure with screws if stacking crates for added stability.
Ideas:
Wall-Mounted Crates: Attach crates to the wall to create floating shelves. This works great in the kitchen for storing spices and utensils, or in the bathroom for towels and toiletries.
Bookshelf from Crates: Stack and secure crates to create a unique and rustic bookshelf. Arrange the crates in an asymmetrical pattern for an eclectic look.
Hanging Baskets: Use sturdy baskets with handles and hang them from hooks on the wall. This can be a stylish way to store fruits and vegetables in the kitchen or toiletries in the bathroom.
Crate Coffee Table: Stack and secure crates to form a coffee table. You can leave the openings accessible for additional storage or add a glass top for a polished look.
Mason Jar Organizers
Mount mason jars on a piece of wood to create a chic wall organizer. This simple yet stylish solution can help keep your small items organized and easily accessible.
How to Do It:
Buy mason jars and hose clamps.
Attach the hose clamps to a piece of wood with screws.
Insert the mason jars into the clamps and tighten.
Mount the wood piece on the wall.
Ideas:
Kitchen Herb Garden: Plant herbs in the mason jars and mount them in your kitchen. This keeps fresh herbs within reach while cooking and adds a touch of greenery to your space.
Bathroom Storage: Use the mason jars to store bathroom essentials like cotton balls, toothbrushes, and makeup brushes. This helps keep your countertop clutter-free and organized.
Craft Supplies: Organize your craft supplies like buttons, beads, scissors, and paintbrushes. Label each jar for easy access and a tidy workspace.
Office Supplies: Store office supplies such as pens, pencils, paper clips, and rubber bands in the jars. This creates a neat and efficient work area.
Spice Rack: Use the jars to hold spices and mount the organizer in your kitchen. Label each jar with the spice name for a convenient and attractive spice rack.
Beauty Products: Store beauty products like makeup brushes, sponges, and hair accessories. This keeps your vanity area tidy and your products easily accessible.
Jewelry Organizer: Hang necklaces, bracelets, and earrings on hooks added to the wood piece, and use the jars for smaller items like rings and brooches.
DIY Lampshades
A new lampshade can completely change the look of a lamp, giving it a fresh and personalized touch.
How to Do It:
Remove the old lampshade.
Measure and cut new fabric or paper to fit.
Attach the new material to the frame with glue or clips.
Reattach the lampshade to the lamp base.
Ideas:
Patterned Fabric: Choose a fabric with a bold pattern, such as florals, geometrics, or abstract designs. This can add a pop of color and personality to any room.
Painted Paper: Use high-quality paper and paint your own design on it. You can create abstract art, ombre effects, or detailed illustrations to match your decor.
String Lights
String lights aren’t just for the holidays; they can add a cozy, whimsical touch to any room.
How to Do It:
Choose a spot to hang the lights.
Use hooks or adhesive strips to secure the lights.
Drape or arrange the lights as desired.
Plug them in and enjoy the ambiance.
Ideas:
Canopy of Lights: Create a magical canopy above your bed or seating area by draping string lights from the ceiling. This adds a dreamy, romantic feel to your space.
Lighted Wall Art: Use string lights to outline shapes or words on your wall. For example, create a heart shape, a star, or write a word like "love" or "dream" for a personalized touch.
Photo Display: Attach photos to a string of lights using small clothespins. This creates a lighted photo gallery that adds a personal and nostalgic element to your decor.
Mason Jar Lanterns: Fill mason jars with string lights and place them around the room. This creates charming lanterns that are perfect for adding soft, ambient lighting.
Lighted Headboard: Attach string lights to the back of your bed's headboard to create a soft, illuminated frame. This adds a subtle and cozy light source for reading or relaxing in bed.
Wrapped Trees or Plants: Wrap string lights around indoor trees or large plants. This adds a magical touch and highlights the natural elements in your home.
Mirror Placement
Place mirrors strategically to reflect light and make rooms appear larger.
How to Do It:
Choose a spot where the mirror will reflect light.
Use a level to ensure the mirror is straight.
Mark the wall for the mirror hooks or brackets.
Hang the mirror securely.
Ideas:
Opposite Windows: Place mirrors directly across from windows to maximize natural light. This not only brightens up the room but also creates the illusion of another window, making the space feel larger and more open.
Entryway Mirrors: Hang a mirror in your entryway to create a welcoming and spacious feel. It also provides a convenient spot for last-minute appearance checks before heading out the door.
Mirror Gallery Wall: Create a gallery wall using mirrors of various shapes and sizes. This adds visual interest and reflects light in multiple directions, enhancing the brightness and depth of the room.
Floor-Length Mirrors: Use tall, floor-length mirrors to make ceilings appear higher and rooms feel more spacious. Lean them against the wall or hang them for a dramatic effect.
DIY Pillow Covers
Make your own pillow covers using fabric, old sweaters, or even t-shirts. This is a great way to personalize your home decor and recycle old materials.
How to Do It:
Measure and cut the fabric to fit your pillows.
Sew the fabric together, leaving an opening to insert the pillow.
Insert the pillow and sew the opening closed.
Ideas:
Decorative Buttons: Add decorative buttons to your pillow covers. You can place them along the edge or use them to create a functional closure on the back or side of the pillow.
Patchwork Design: Use fabric scraps to create a patchwork pillow cover. Sew together various pieces of fabric in a pattern to create a unique and colorful design.
Embroidered Details: Add a personal touch with embroidery. You can stitch initials, names, or decorative patterns onto the fabric before sewing it into a pillow cover.
Appliqué Accents: Cut out shapes from contrasting fabric and sew them onto the pillow cover for a fun appliqué design. This works great for creating themed pillows for holidays or special occasions.
Fringe or Tassel Edges: Sew fringe or tassels along the edges of your pillow covers for a boho-chic look. This adds texture and a playful element to your pillows.
Herb Gardens
Create a small herb garden in your kitchen. Growing your own herbs not only adds a fresh touch to your cooking but also brings greenery and a pleasant aroma to your space.
How to Do It:
Choose small pots or mason jars.
Fill them with soil and plant your herbs.
Place them in a sunny spot in your kitchen.
Ideas:
Vertical Herb Garden: Use a vertical planter or tiered shelves to maximize space. This can be mounted on a wall or placed on a counter to create a vertical herb garden, which is both space-saving and visually appealing.
Hanging Herb Planters: Install hooks or a rod under your kitchen cabinets and hang small pots or mason jars. This keeps your herbs within easy reach while freeing up counter space.
Chalkboard Labels: Paint the pots or jars with chalkboard paint and label each one with the name of the herb. This adds a rustic charm and helps you identify your plants easily.
Repurposed Containers: Use unique containers such as old teacups, tin cans, or wine bottles cut in half. This adds a creative and eco-friendly touch to your herb garden.
Branch Decor
Collect branches from your yard or a local park and use them as decorative elements. This simple and natural decor can add a rustic or modern touch to your home.
How to Do It:
Clean and dry the branches.
Paint them white or leave them natural.
Arrange them in vases or hang them on the wall.
Ideas:
String Light Branches: Wrap string lights around the branches and place them in a vase or along a mantel. This adds a cozy and magical touch to your decor, perfect for any season.
Branch Wall Art: Arrange branches in a pattern on the wall and secure them with nails or adhesive hooks. You can create a simple, minimalist design or an elaborate, intricate pattern.
Driftwood Centerpiece: Use driftwood branches for a coastal-inspired centerpiece. Arrange them on a tray with candles, shells, and pebbles to create a beautiful table display.
Hanging Branch Mobile: Create a mobile by hanging smaller branches from a larger one. Attach the branches with twine or string and hang the mobile from the ceiling for a whimsical, floating effect.
Jewelry Tree: Use a sturdy branch as a jewelry holder. Place the branch in a decorative pot and hang necklaces, bracelets, and rings on its smaller twigs.
Terrariums
Creating your own terrariums using glass containers, pebbles, and small plants is a fun and rewarding way to add greenery to your space.
How to Do It:
Choose a glass container.
Add a layer of pebbles for drainage.
Add soil and small plants.
Decorate with moss or small figurines.
Ideas:
Layered Sand Terrarium: Create colorful layers using different shades of sand between the pebbles and soil. This adds a vibrant, artistic touch to your terrarium.
Desert Terrarium: Use succulents and cacti with sand and rocks to create a desert-themed terrarium. This requires less maintenance and adds a unique look to your decor.
Moss Terrarium: Focus on different types of moss to create a lush, green landscape. Moss terrariums are low-maintenance and bring a touch of nature indoors.
Mosaic Tabletop
Create a colorful mosaic on an old table to give it a fresh, artistic look.
How to Do It:
Collect broken tiles, glass, or ceramics.
Arrange the pieces on the tabletop in a pattern.
Glue the pieces down with tile adhesive.
Fill the gaps with grout and wipe off excess.
Ideas:
Geometric Patterns: Create a mosaic with geometric shapes like triangles, squares, or hexagons. Use contrasting colors to make the pattern stand out.
Nature-Inspired Designs: Incorporate natural elements such as leaves, flowers, or seashells into your mosaic. This can create a calming, organic look for your tabletop.
Abstract Art: Arrange the pieces in an abstract design for a modern and artistic feel. Use a mix of colors and shapes to create a unique, eye-catching pattern.
Monochromatic Scheme: Choose tiles and glass pieces in varying shades of a single color to create a sophisticated, monochromatic look. This can add depth and texture without overwhelming the space.
Random Mosaic: Arrange the pieces in a random, freeform pattern for a whimsical, eclectic look. This is a great way to use up leftover materials and create a one-of-a-kind design.
Mixed Materials: Combine different materials like stones, beads, and small mirrors with your tiles and glass pieces. This adds texture and dimension to your mosaic.
Grout Colors: Experiment with different grout colors to change the look of your mosaic. Dark grout can make colors pop, while light grout can create a softer, more blended effect.
Vintage Ladder Display
Turn an old ladder into a stylish display shelf to add a rustic charm to your home.
How to Do It:
Clean and sand the ladder.
Paint or stain the ladder if desired.
Lean it against a wall and use the rungs to display books, plants, or decorative items.
Ideas:
Bathroom Towel Rack: Use the ladder in your bathroom to hang towels. Roll up small towels and place them on the rungs or drape larger towels over the rungs for a functional and stylish display.
Plant Stand: Turn the ladder into a vertical garden by placing small potted plants on each rung. This creates a green, vibrant display that adds life to any room.
Bookshelf: Use the ladder as a unique bookshelf. Stack books horizontally on each rung or lean them vertically for a creative way to display your collection.
Blanket Ladder: In the living room or bedroom, use the ladder to drape blankets and throws. This keeps them within easy reach and adds a cozy, layered look to your decor.
Seasonal Decor: Change up the items on your ladder display to reflect the seasons. For example, add pumpkins and gourds in the fall, ornaments and garlands in the winter, flowers in the spring, and seashells and lanterns in the summer.
Entryway Organizer: Place the ladder in your entryway to hold bags, hats, and scarves. You can also add small baskets on the rungs to store keys, mail, and other essentials.
Bathroom Storage: Use the ladder to hang baskets or bins from the rungs to store toiletries, bath products, and other bathroom essentials. This keeps everything organized and accessible.